For those of you into movies, cartoons and toys of the 1980s and scathing commentary on said things, I would like to introduce you to RetroBlasting, where a pop culture icon of the radical decade is deconstructed and presented in a new way.
Part history lesson, part psychotic over-analysis, RetroBlasting's video episodes will show you the secret histories of your favorite childhood shows and toys, the movies and tropes and also grant you an exclusive glimpse into the life of a dedicated geek (as well as an archive of plastic memories!)
Enjoy, like, subscribe and submit your comments and ideas! RetroBlasting wants to hear from you!
http://www.youtube.com/retroblasting
http://www.facebook.com/RetroBlasting
Thursday, May 24, 2012
Friday, April 13, 2012
On the road again...with new A/C...but grumpy
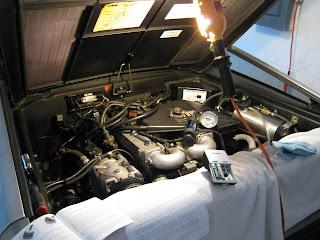
Well, the DeLorean is FINALLY back on the road! I still need to make a few adjustments to the fascia screws as they are "dimpling" the fascia a bit. In other news, the car now has a revamped and retrofitted A/C system that now operates with R-134a!!! Finally to have cool air in the car again on hot days!
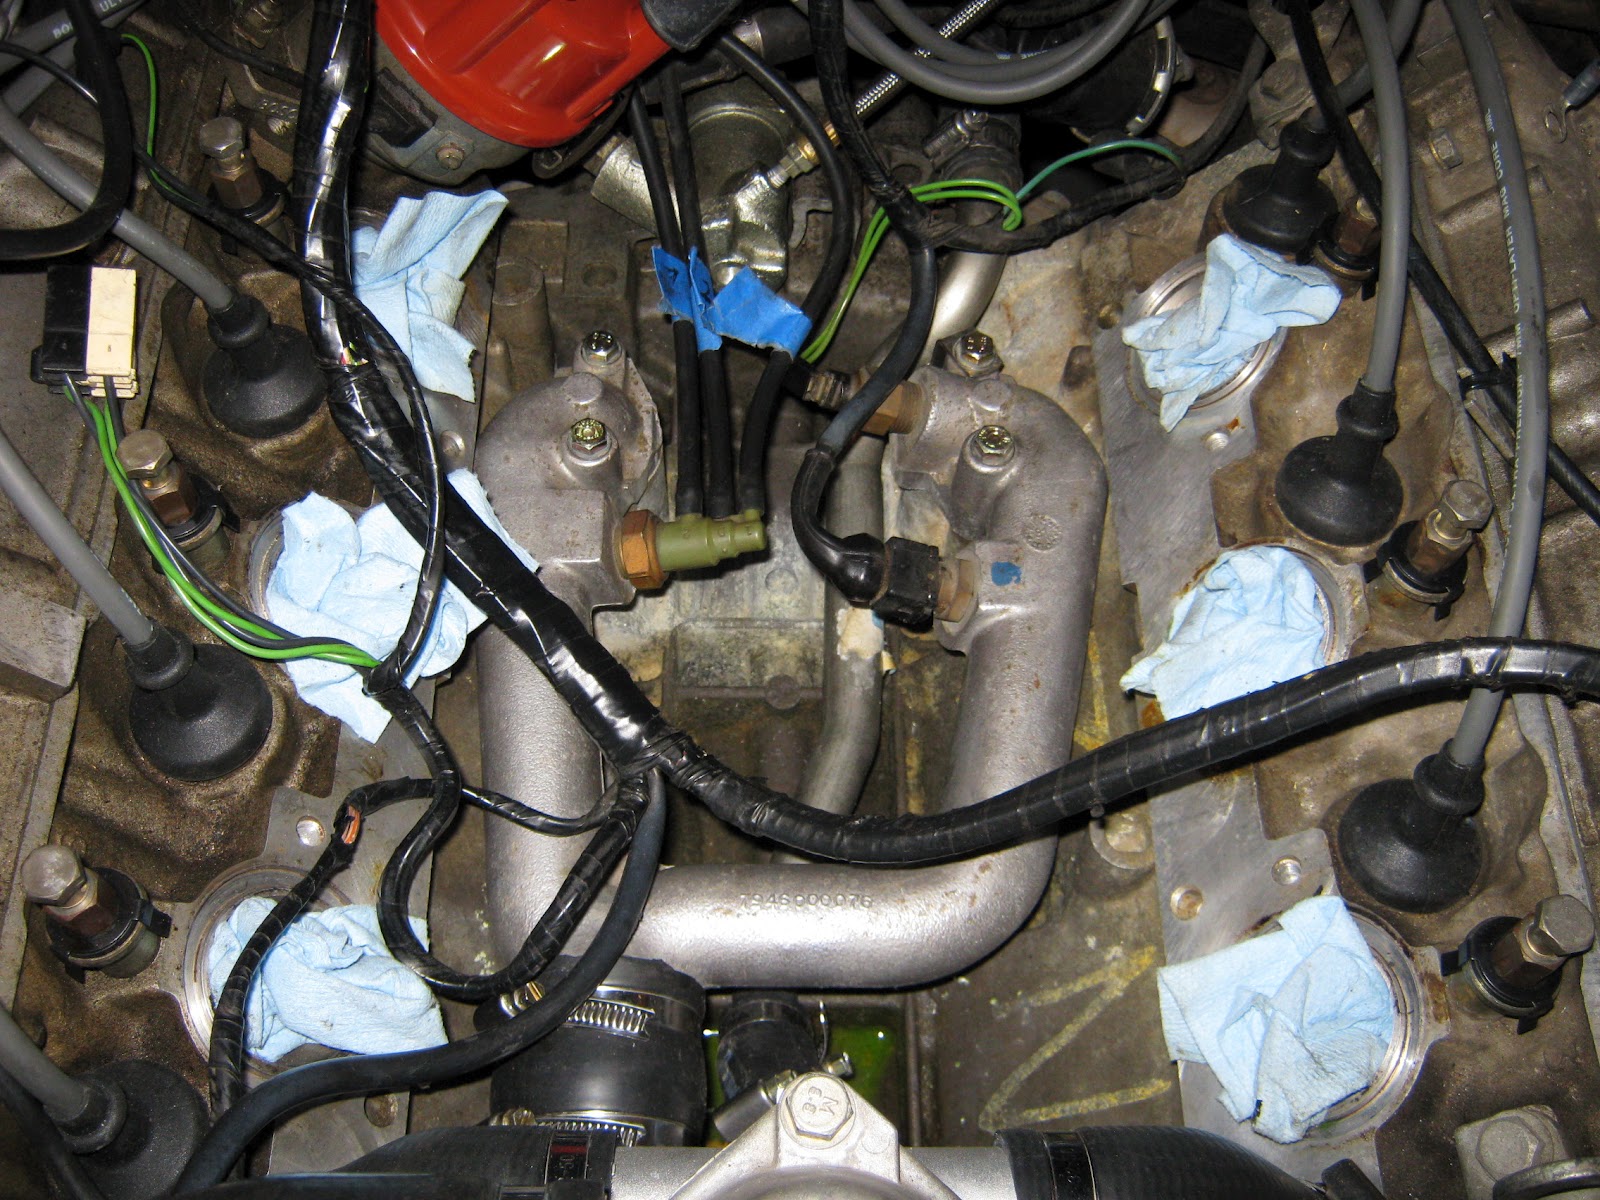
The real issue though is the engine itself. The car fires up reliably, but cold starts are kind of rough and the car wants to idle at 1000 RPMs + change which is higher than the normal 900 RPMs. Not sure how to account for this increase, but it was worse at the proper fuel dwell setting, coming in at 1300 RPMs. Had to adjust the mixture to temporarily compensate until I can figure out the real cause.
The real issue though is the engine itself. The car fires up reliably, but cold starts are kind of rough and the car wants to idle at 1000 RPMs + change which is higher than the normal 900 RPMs. Not sure how to account for this increase, but it was worse at the proper fuel dwell setting, coming in at 1300 RPMs. Had to adjust the mixture to temporarily compensate until I can figure out the real cause.
Monday, April 9, 2012
The end is in sight!
After a scare with the car not starting after we reassembled the intake manifold, I was able to "isolate" the problem to the sparkplug wires and a bad RPM relay. Not sure how much of that I broke in the process, but oh well. Fellow DMC owner Nullset helped me diagnose the problems and reseat the wires. I ended
Yesterday, Joe and I changed the transmission fluid with a little ingenuity extending the funnel with a piece from a crappy fluid pump. The old fluid absolutely stank and was filthy. I was glad to be rid of it.
We added the new front marker lights, changed the luggage compartment cable and spring, then proceeded to reattach the rear fascia and closing panel, which turned into an ordeal. The closing panel had to be loosened up significantly to accommodate the fascia, and in the process we broke a hole on the panel that was under pressure from a fascia stud. Whoops. looks like it will be ok though.
With any luck, I will have the DeLorean back on the ground tonight!
Thursday, April 5, 2012
The slow upgrade of 6239...
Since ownership, I've done my utmost to take extreme care of this vehicle. In the process, I have upgraded many parts and systems, and I continue to do so. The other day, I was stunned when I put the list together in my head of everything I've done so far.
- Upgraded alternator
- New wiper fluid motor and harness
- Upgraded cooling fans
- New cooling fan shroud
- Upgraded headlights
- Upgraded front springs
- Upgraded shocks (front and back)
- New outriggers for front suspension arms
- New brake pads and pins
- Upgraded headlight switch
- Upgraded stereo
- Upgraded speakers (front and rear)
- Upgraded speaker wires
- New front wheel bearings
- Upgraded polyurethane sway bar bushings
- New rotors (front and back)
- Upgraded fan and fan-fail relays (solid state)
- Upgraded cooling system bleeder assembly
- Upgraded catalytic converter
- New oil pressure gauge sender
- Upgraded muffler heat shield
- Upgraded lower muffler bracket
- New belts
- New water pump
- New water pump hoses and clamps
- New coolant inlet pipes
- New warm-up regulator
- Upgraded sparkplugs
- New sparkplug wires
- New O2 sensor (2011)
- New O2 sensor (2012)
- New intake o-rings
- New copper washers for fuel distributor
- New injector seals and clamps
- New rear fascia
- New roof trim screws
- Upgraded RPM relay (solid state)
- New luggage compartment latch cable
- New side marker light housings and gaskets
- New otterstat and seal
- New fuel injectors (soon)
- New tires (soon)
- Upgraded starter motor (soon)
Thursday, March 22, 2012
Where am I so far???
My intentions for the Winter 2012 repair schedule have changed radically and unexpectedly in the last few weeks. So I decided to see what has been done vs. was intended.
As originally intended:
- Replace engine mounts - DONE
- Replace catalytic converter - DONE
- Replace muffler heat shield - DONE
- Test and recharge A/C system
- Change belts and tighten - DONE
- Flush transmission fluid
- Install clutch bleeder kit, flush clutch fluid - INSTALLED, NOT BLED
- Oil change
- Test otterstat - DONE/REPLACED
- Fix luggage compartment latch
- Fix rear louvers latch
- Replace engine light switch
- Replace rear fascia
- Replace vacuum cap on charcoal canister - DONE
- Recondition steering column ends
- Replace seal cap on passenger side, lower body
- Lower rear springs - DONE
- Flush cooling system and refill - DONE
Unexpected/added tasks:
- Tighten all coolant hose connections - DONE
- Replace water pump - DONE
- Replace cracked muffler bracket - DONE
- Acquire longer M7 bolts for A/C idler pulley attachments - DONE
- TimeSert stripped threads in timing cover at A/C idler pulley - DONE
- Clean engine "valley" due to coolant leaks - DONE (TWICE)
- Replace sparkplugs - DONE
- Replace sparkplug wires - DONE
- Replace distributor cap - DONE
- Replace rotor - DONE
- Clean fuel injectors
- Replace injector seals and clips - DONE
- Replace fuel filter - DONE
- Replace Control Pressure Regulator - DONE
- Clean Idle Speed Motor
- Replace all o-rings and gaskets on intake manifold
- Replace all bolts on cross-over pipe - DONE
- Re-secure T-roof panel
Monday, March 19, 2012
And all the other repair BS...
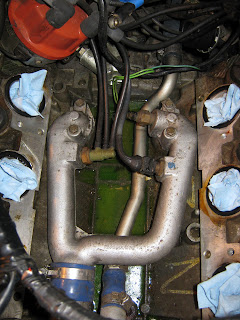
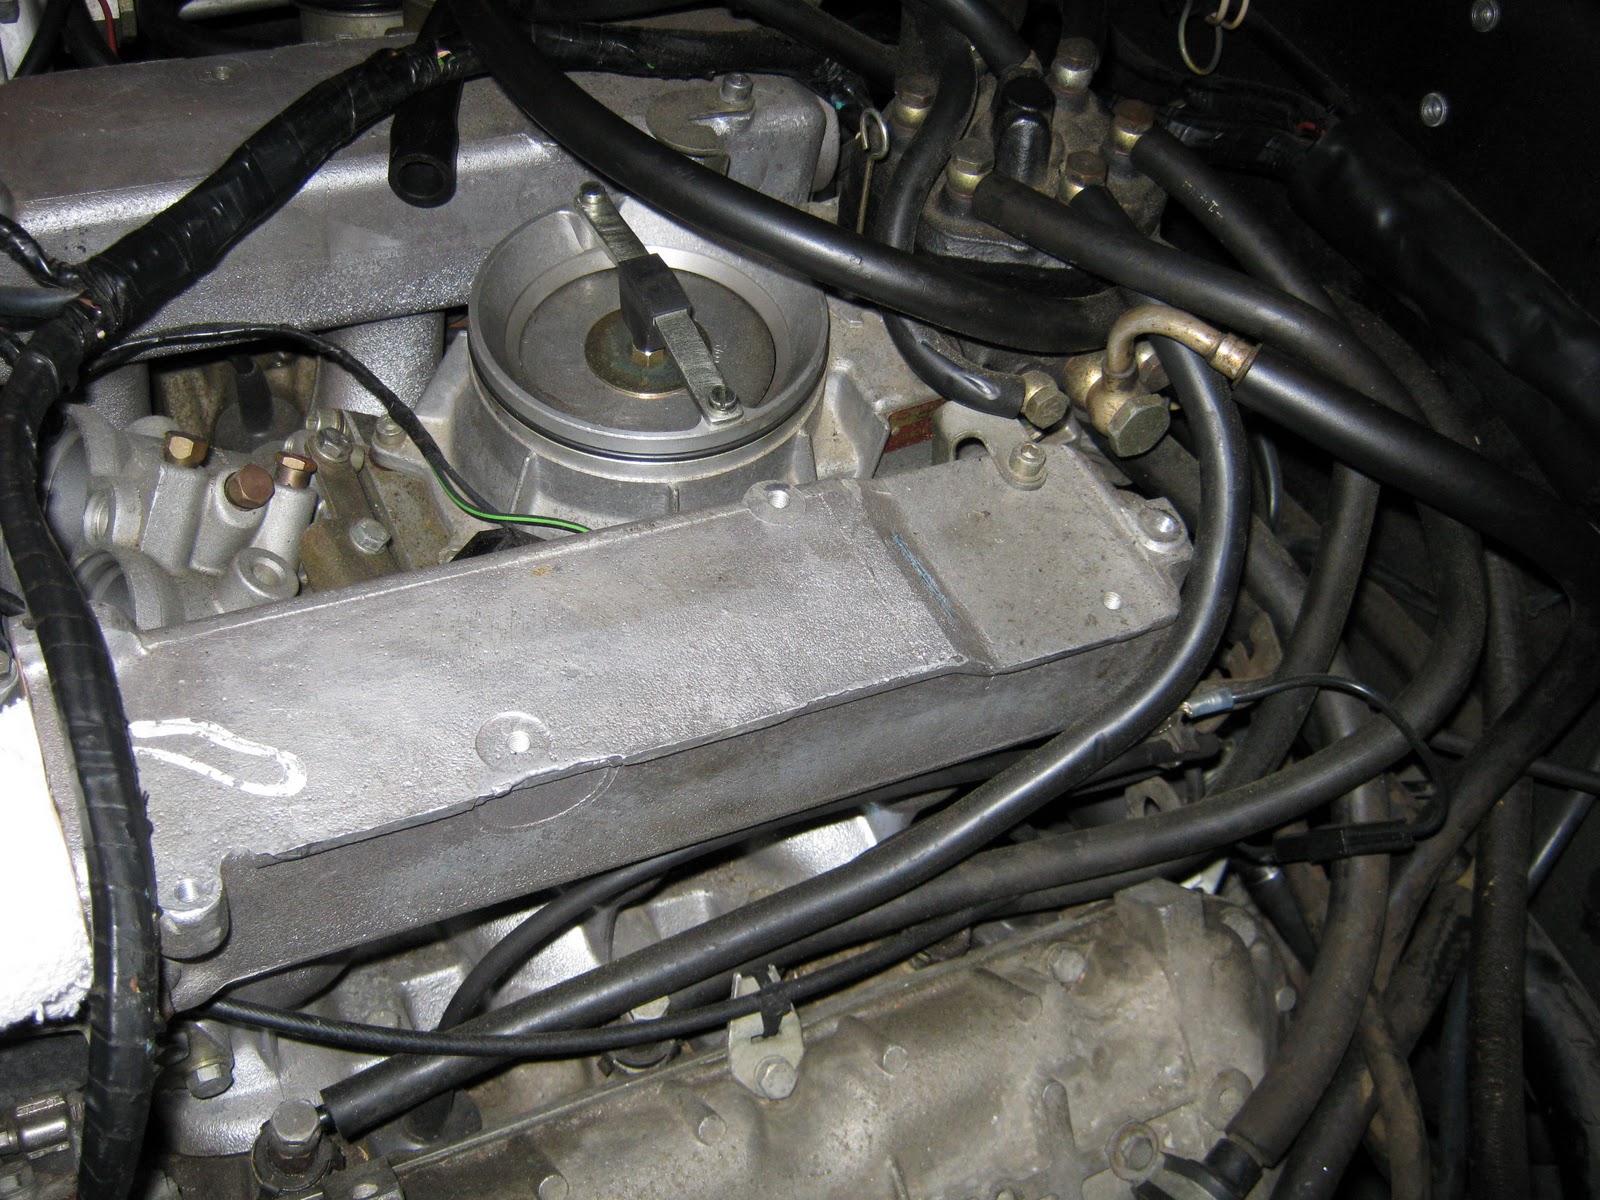
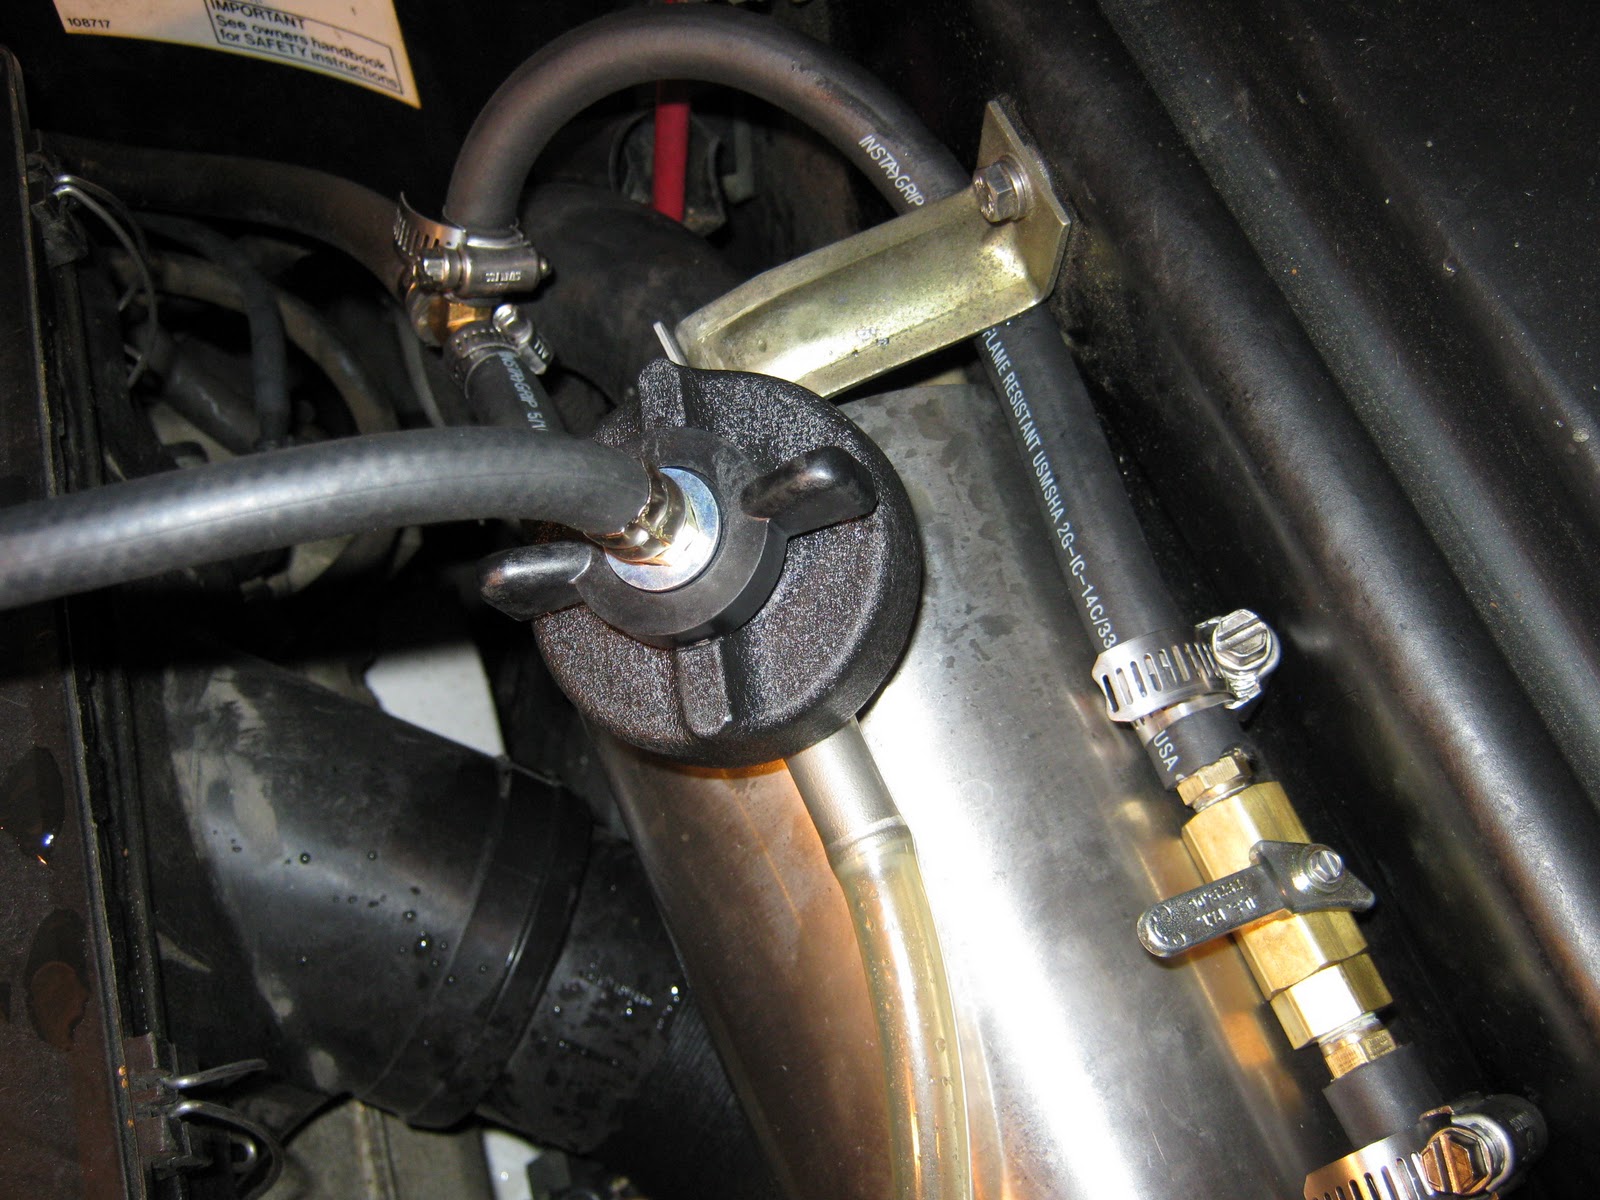
The wrestling match with the cooling system was just the main epic struggle over the past few weeks. There have been a series of ancillary battles taking place on the periphery. Joe and I went to install new A/C and alternator belts, but quickly discovered how easily the holes for the bolts in the timing cover like to strip threads! The first hole to strip was the lowest one on this assembly...

You may also notice a bolt-less hole to the right of the upper pulley wheel. That hole also stripped out, and those threads were past the timing cover in the engine block itself! What to do, what to do...
For the lower hole, I purchased a Time Sert thread repair kit (on the left in the photo below). The $70 was steep, but best to do it right. For that hole in the engine block, Joe fortunately determined the hole was deeper than the bolt was long, so I ordered special long-threaded M7 bolts from a company in England via Ebay (in the right of the photo).

I discovered that my DeLorean was missing the crucial A/C belt tension bolt that would make the whole process much much easier, so we restored that part to the assembly as well.

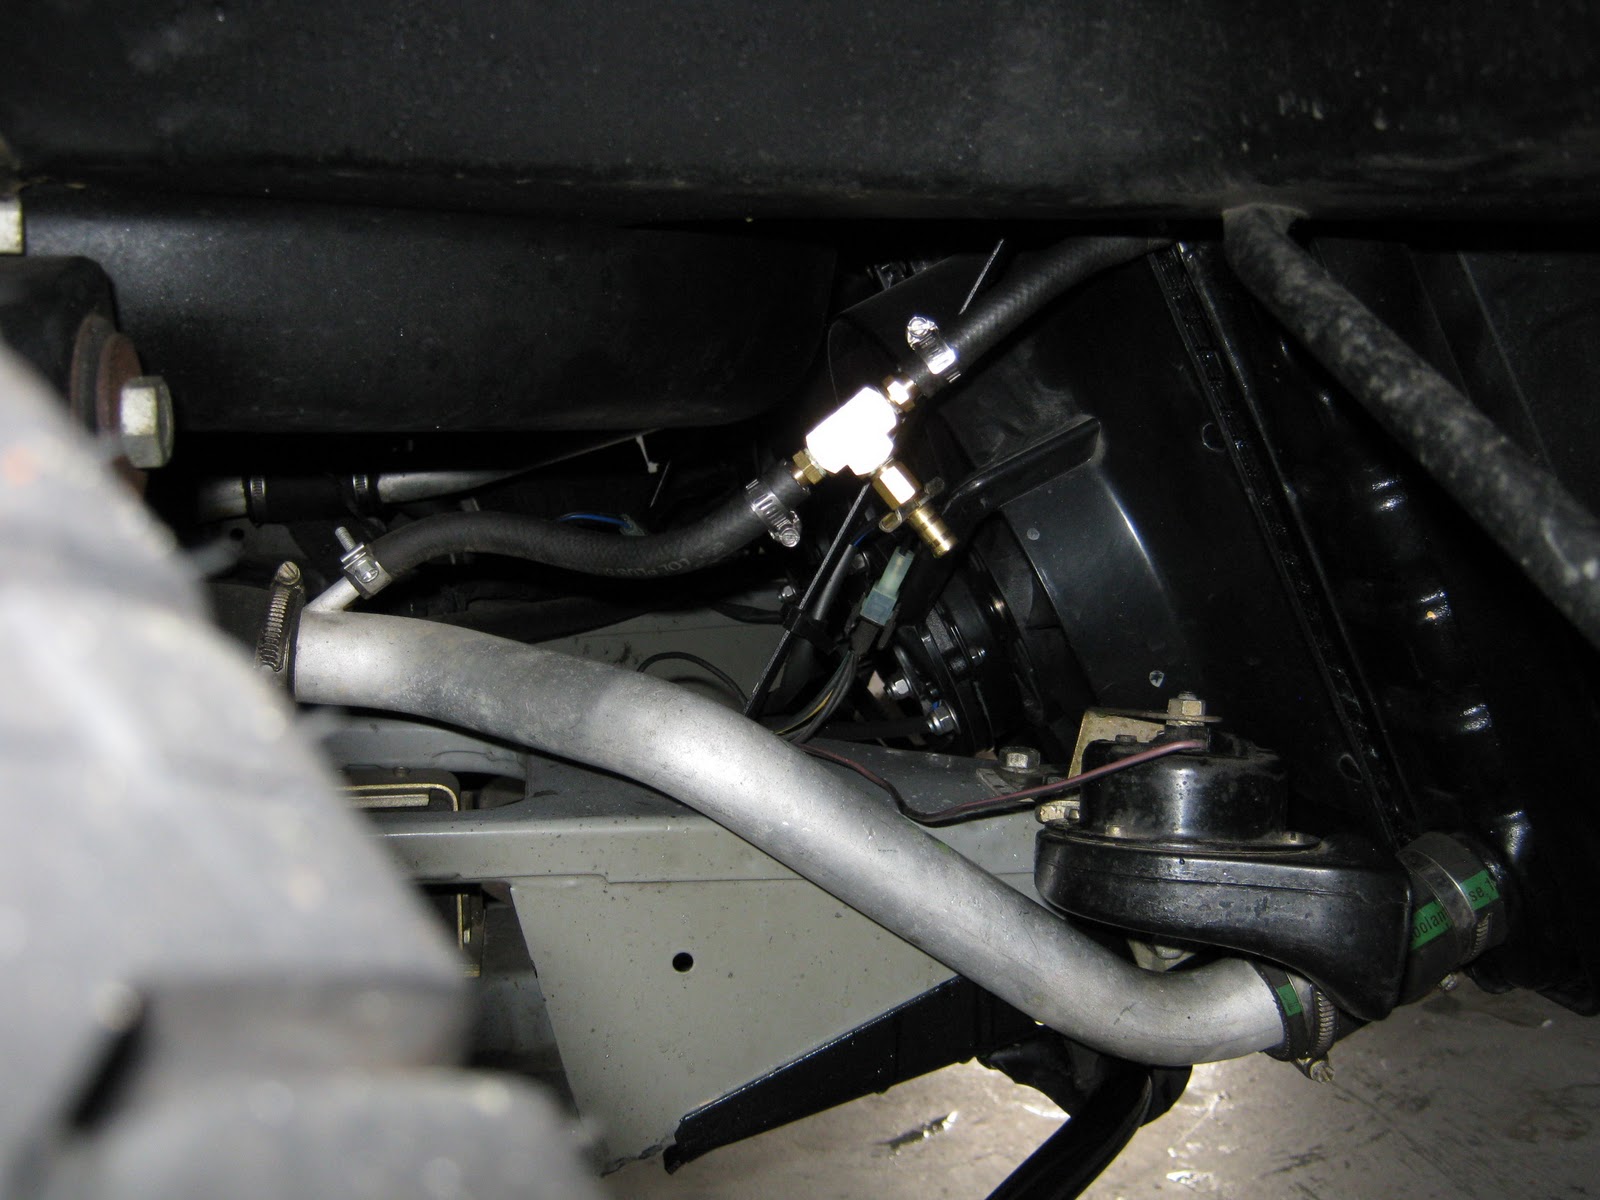
Joe and I also had a hell of a time with a clutch bleeder cable that is supposed to make bleeding the slave cylinder easier in the future. The cable seals came undone during installation and the cable leaked hydraulic fluid into the valley of death. Ugh. Special-T-Auto sent a replacement that was much better quality. That has now been installed.

Another task involved lowering the rear shocks. Ever since I installed them last winter with the front now on lowering springs, the rear looked way too high off the tires. I ordered some shock adjustment spanners from Jegs and muscled the shocks down half an inch each.

Joe and I also replaced the sparkplugs with Bosch Platinums, the fuel injector boots and clips, the distributor cap and rotor as well as all of the sparkplug wires...


We also completely replaced the 30-year-old catalytic converter with a heat-shielded one from Special-T-Auto, replaced a cracked muffler bracket and all the rubber bushings around the muffler.


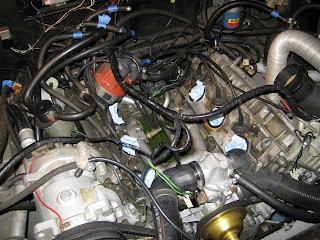
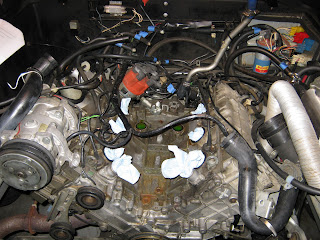
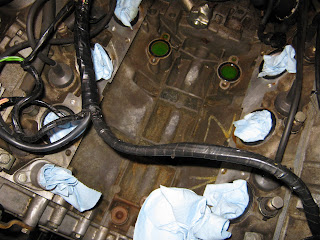
Overall the engine bay is really starting to come together again. Enjoy the before and after (so far) photos below...


You may also notice a bolt-less hole to the right of the upper pulley wheel. That hole also stripped out, and those threads were past the timing cover in the engine block itself! What to do, what to do...
For the lower hole, I purchased a Time Sert thread repair kit (on the left in the photo below). The $70 was steep, but best to do it right. For that hole in the engine block, Joe fortunately determined the hole was deeper than the bolt was long, so I ordered special long-threaded M7 bolts from a company in England via Ebay (in the right of the photo).

I discovered that my DeLorean was missing the crucial A/C belt tension bolt that would make the whole process much much easier, so we restored that part to the assembly as well.

Joe and I also had a hell of a time with a clutch bleeder cable that is supposed to make bleeding the slave cylinder easier in the future. The cable seals came undone during installation and the cable leaked hydraulic fluid into the valley of death. Ugh. Special-T-Auto sent a replacement that was much better quality. That has now been installed.

Another task involved lowering the rear shocks. Ever since I installed them last winter with the front now on lowering springs, the rear looked way too high off the tires. I ordered some shock adjustment spanners from Jegs and muscled the shocks down half an inch each.

Joe and I also replaced the sparkplugs with Bosch Platinums, the fuel injector boots and clips, the distributor cap and rotor as well as all of the sparkplug wires...


We also completely replaced the 30-year-old catalytic converter with a heat-shielded one from Special-T-Auto, replaced a cracked muffler bracket and all the rubber bushings around the muffler.


Overall the engine bay is really starting to come together again. Enjoy the before and after (so far) photos below...


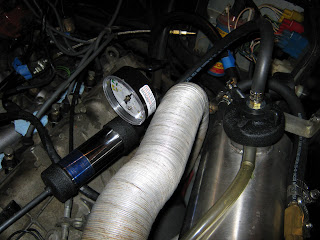
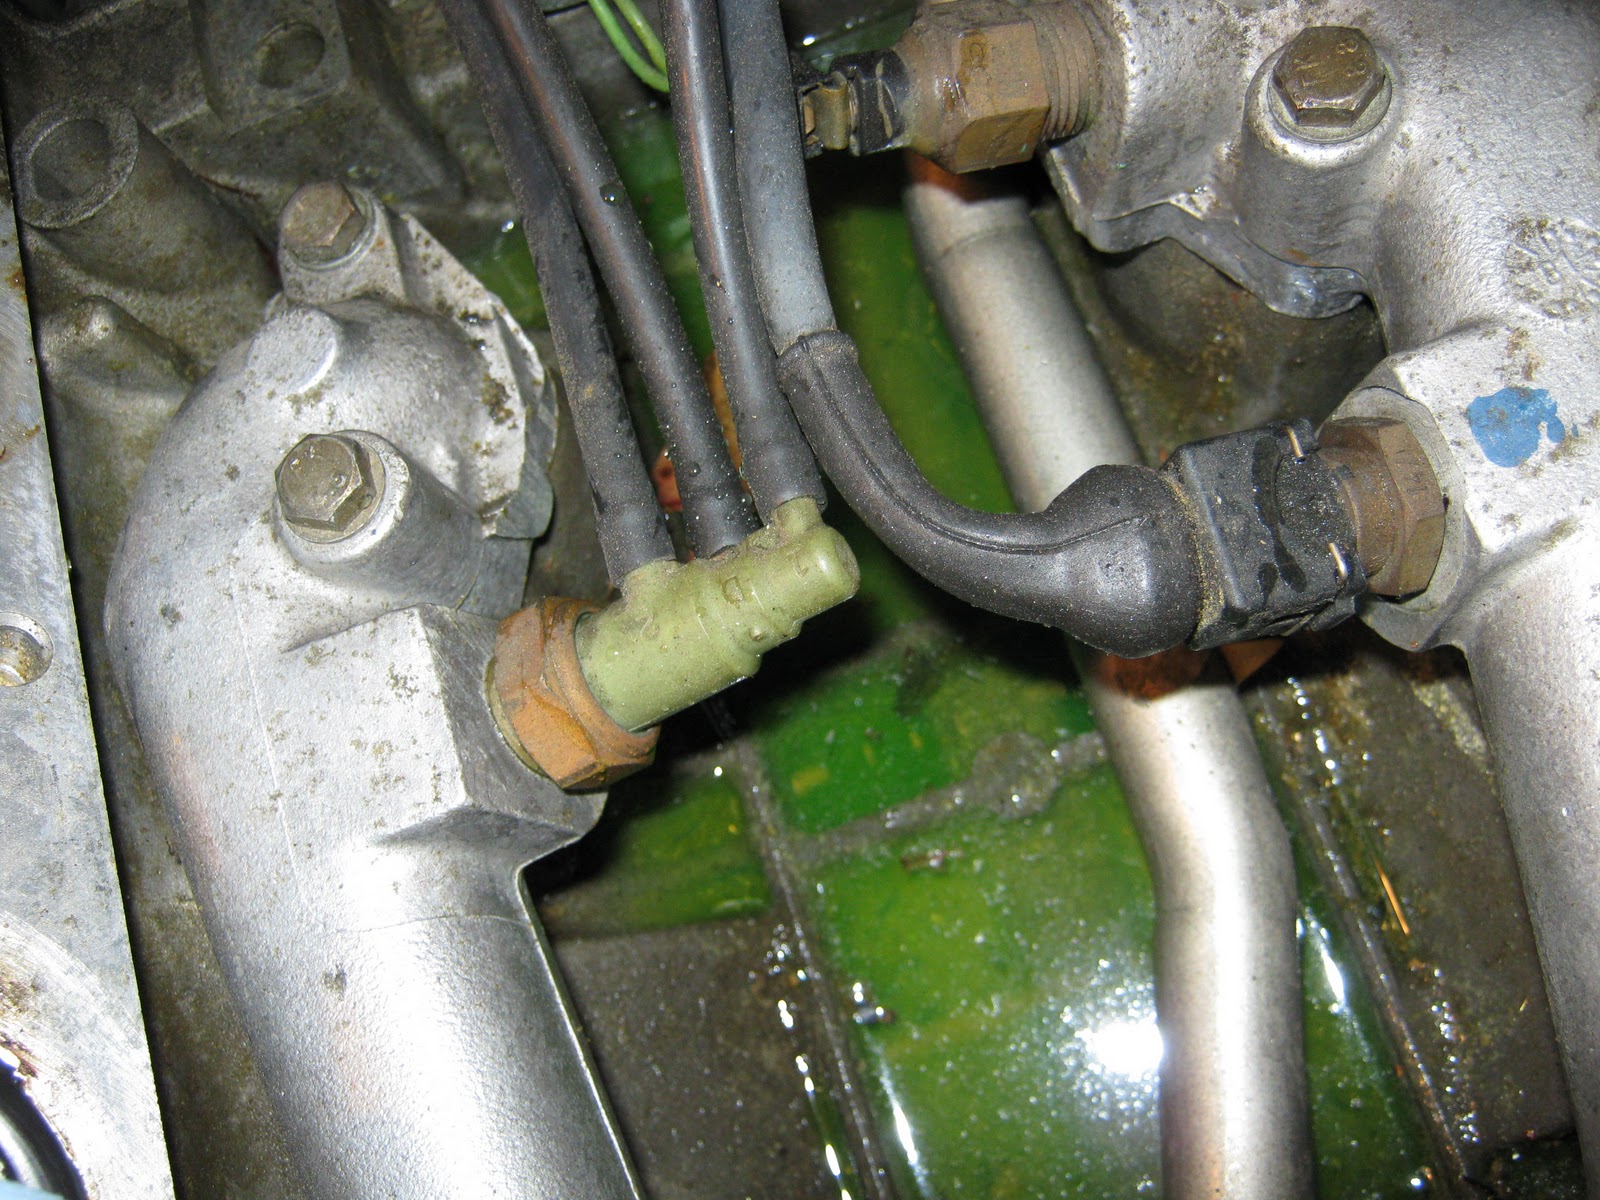
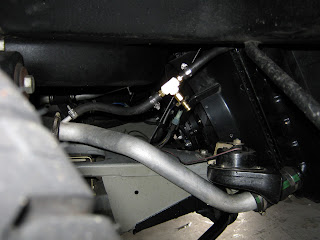
We've Got Pressure!!!! FINALLY!!!!
A series, nay--A saga of setbacks have plagued 6239's resurrection from Winter 2012. Only stands to reason given that 2012 didn't have a winter at all. The coolant flush and refill from the flooded valley ended in a further disaster when Joe and I learned the water pump was kaput. So the whole system had to be drained and the water pump removed, which re-flooded the valley. The bolts were so rusty on the back of the pump, one snapped and the rest were toast. After getting a new water pump from DMC Houston and new bolts for the pump from an online Volvo parts warehouse, Joe, Jeff and myself reassembled the water pump and tried again.
The pump was missing a plug bolt that I had to reacquire. I snagged one from Voluparts here in Atlanta and another was graciously sent my way by DeLorean restoration facility DPI. Unfortunately, no matter what I did, the plug bolt would "weep" coolant when under pressure. Not good, and no matter what I tried, it wouldn't seal.

So after the fifth failed attempt, I ended up punching a hole in the garage wall...

Then I said to hell with it and broke out the teflon tape and Permatex...


The moral of this story is even brand new parts on a DeLorean can give you a terrible time. Be ready mentally for anything, otherwise your drywall will suffer. It was an admittedly glorious moment when the system held pressure without any leaks!
DeLoreans will also teach you how to make your own tools. That plug bolt sits in a tight cradle on the pump that a typical ratchet and a box wrench have an impossible time getting into. So I ran out to Northern Tool and grabbed a long 19mm socket, then took the Dremmel's grinding wheel to it to taper the end so I could get it into the space.

The pump was missing a plug bolt that I had to reacquire. I snagged one from Voluparts here in Atlanta and another was graciously sent my way by DeLorean restoration facility DPI. Unfortunately, no matter what I did, the plug bolt would "weep" coolant when under pressure. Not good, and no matter what I tried, it wouldn't seal.

So after the fifth failed attempt, I ended up punching a hole in the garage wall...

Then I said to hell with it and broke out the teflon tape and Permatex...


The moral of this story is even brand new parts on a DeLorean can give you a terrible time. Be ready mentally for anything, otherwise your drywall will suffer. It was an admittedly glorious moment when the system held pressure without any leaks!

DeLoreans will also teach you how to make your own tools. That plug bolt sits in a tight cradle on the pump that a typical ratchet and a box wrench have an impossible time getting into. So I ran out to Northern Tool and grabbed a long 19mm socket, then took the Dremmel's grinding wheel to it to taper the end so I could get it into the space.

Tuesday, February 7, 2012
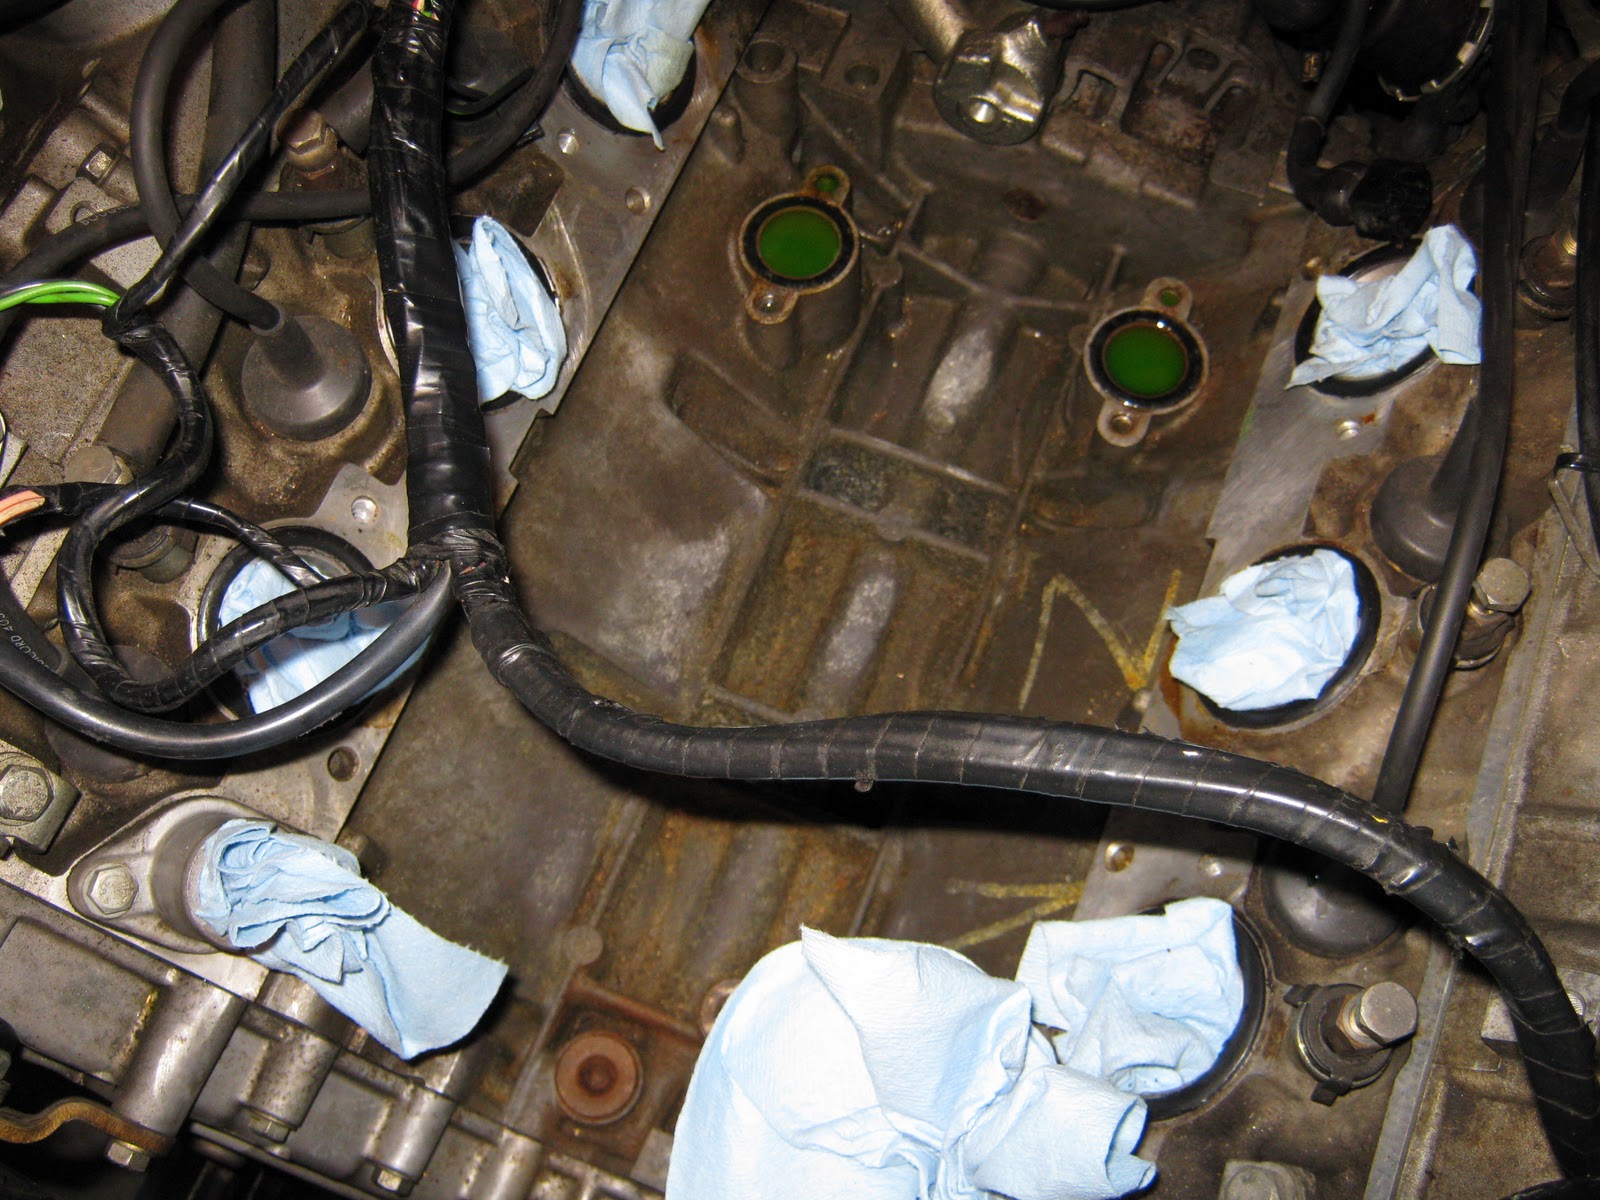
How Green Was My Valley
Alas, the rebuilding and refilling of the coolant system resulted in another setback. The water pump itself was leaking through the main gasket. Result? The cooling system had to be re-drained and torn down again, which reflooded the valley of the block with coolant.
The pump is in shambles. All five of the back bolts were rusted. One seized and snapped in half. It would be kind to call the gasket "rotten." Everything will have to be replaced.
To add insult to injury, a tension bolt for the A/C pulley bracket managed to strip the mounting hole inside the engine block. Looks like I'm going to learn the fine art of TimeSerts too...
Saturday, January 28, 2012
New Engine Mounts and Other Chaos
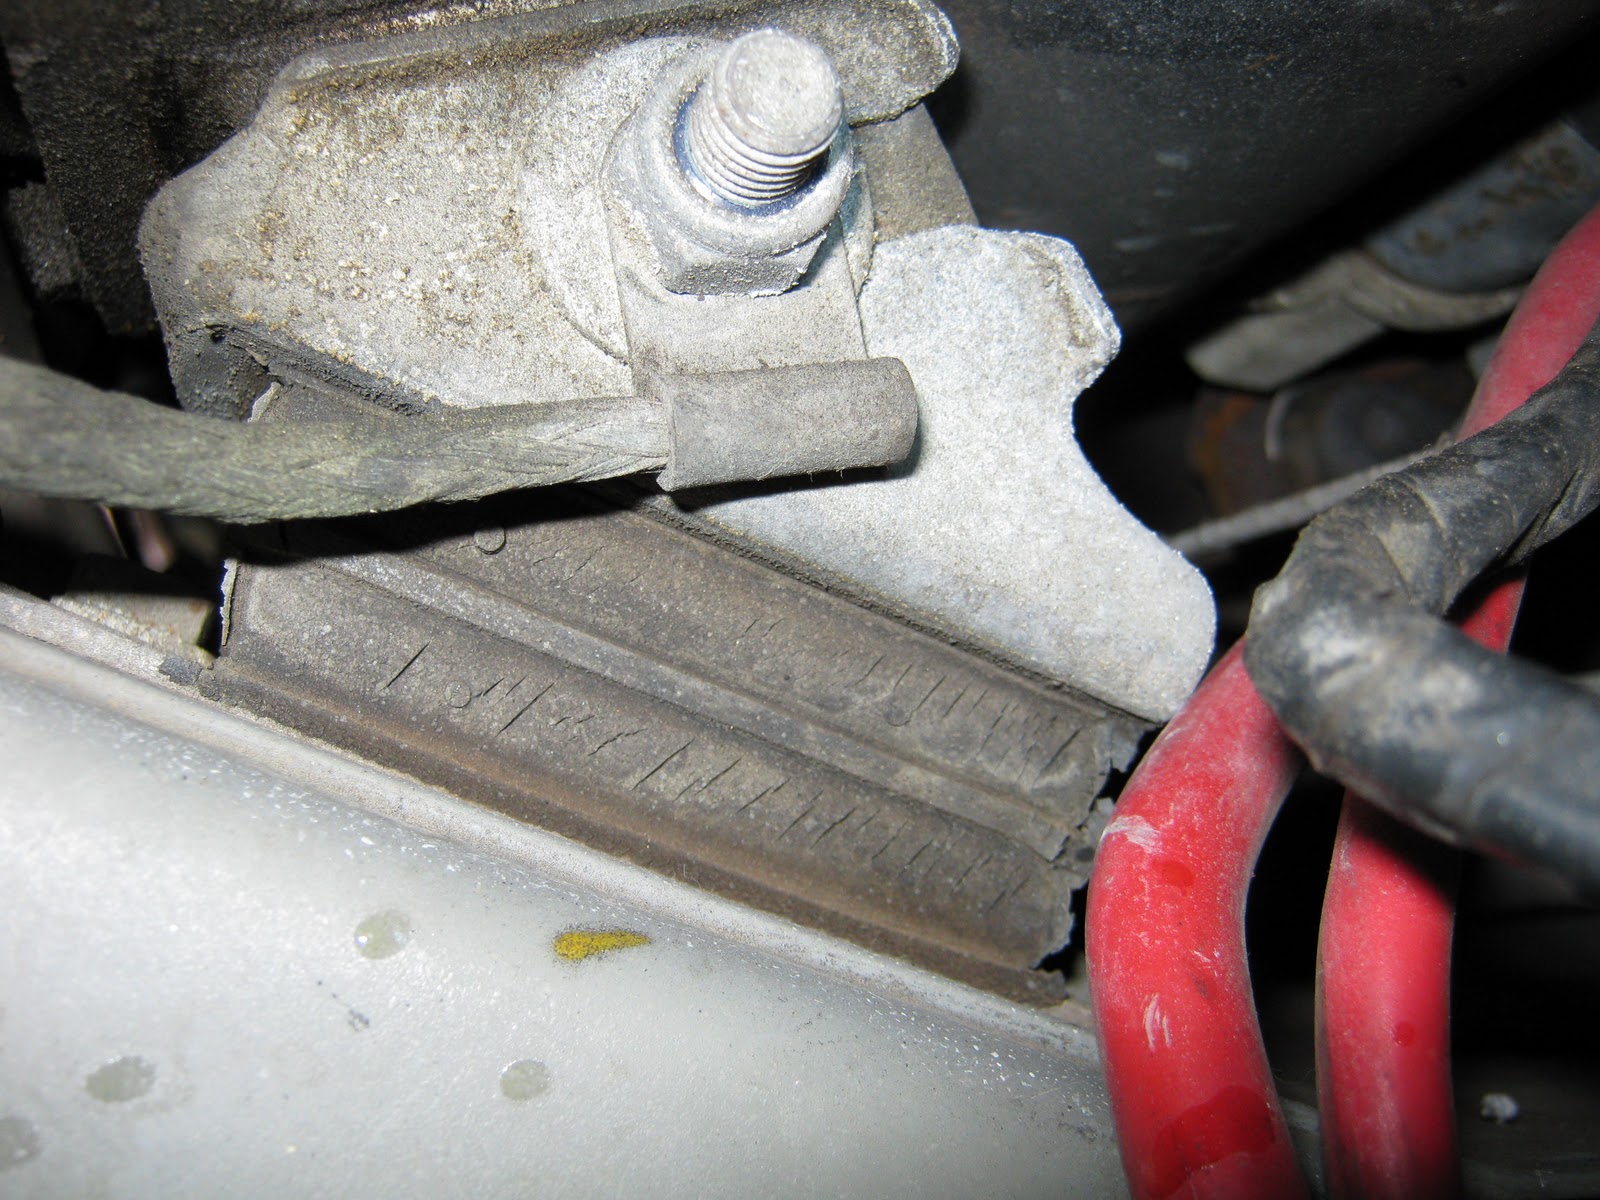
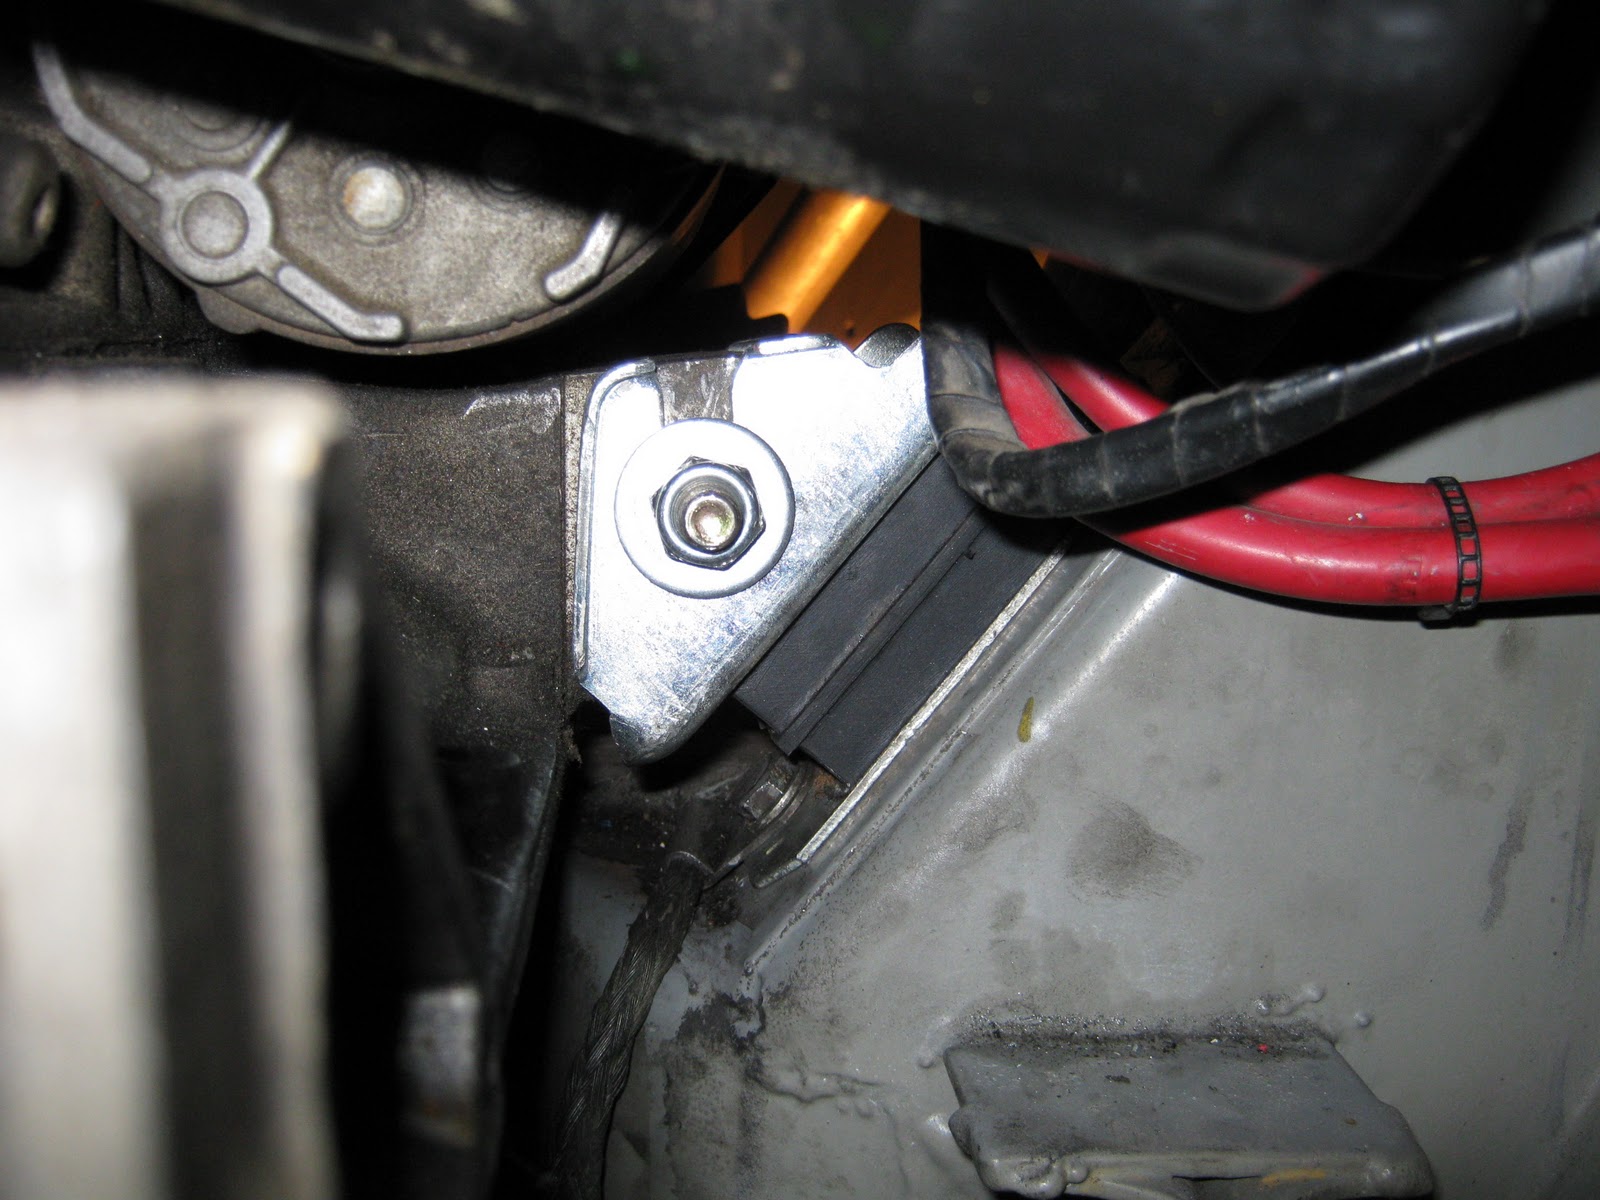
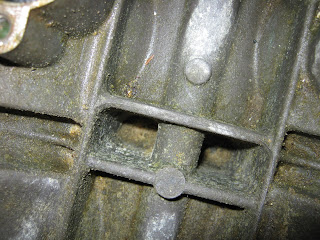
The disassembling of the engine's intake manifold has had a domino effect and today Joe and I found a series of other components that required removal. Before the coolant flush difficulties, I had intended to replace the engine mounts. Now with the entire upper half of the engine gone, it seemed like the perfect time to do so as the new mounts weren't doing anything pressing sitting in their bags. We ran into a few difficulties accessing the bolts, so since I had planned to replace the catalytic converter anyway, the muffler, CAT and brackets all came off as well.


It took some funky combinations of ratchets and extensions to get to the bolts attaching the CAT to the rest of the exhaust system. Once it was off the car, the work room was greatly expanded. The motor mounts were original and badly dry-rotted.

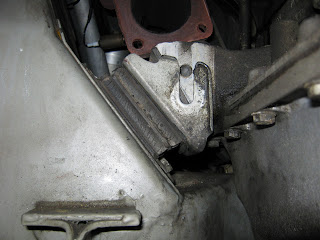
The new mounts are a welcome addition to the engine refurb' and tune-up. We also found a cracked mounting bracket for the muffler while in there, so it looks like it was good to get into it and sort everything out.
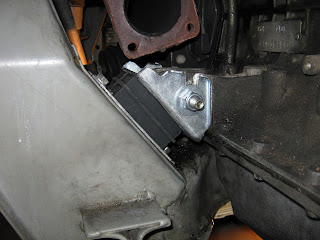
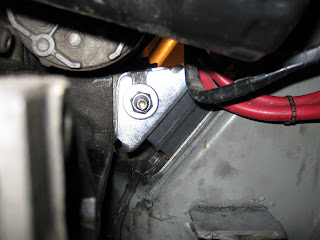
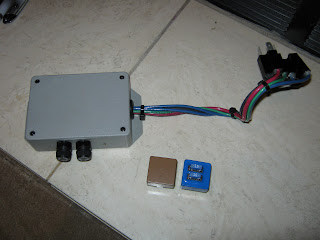
I also managed to get a plug-and-play upgrade into the vehicle - solid state fan relays to replace the cumbersome relay box. Made a lot of room in the fuse box.


It took some funky combinations of ratchets and extensions to get to the bolts attaching the CAT to the rest of the exhaust system. Once it was off the car, the work room was greatly expanded. The motor mounts were original and badly dry-rotted.


The new mounts are a welcome addition to the engine refurb' and tune-up. We also found a cracked mounting bracket for the muffler while in there, so it looks like it was good to get into it and sort everything out.
I also managed to get a plug-and-play upgrade into the vehicle - solid state fan relays to replace the cumbersome relay box. Made a lot of room in the fuse box.

Valley of Death Flooded with Coolant
The DeLorean's coolant flush has turned into a nightmare. It has revealed leaks at almost every junction of the car's cooling system, including a nice lake in the engine's Valley of Death. This has resulted in the complete (and unexpected) disassembling of the intake manifold, water pump, fuel injection system and other components so the valley can be cleaned and the cooling system refilled and retested.


Tuesday, January 17, 2012
2012 Winter Project List
So, here's a listing of what needs to be done this winter and I've also included a list of what has been done in the past three years!
To do list:
To do list:
- Replace engine mounts
- Replace catalytic converter
- Replace muffler heat shield
- Test and recharge A/C system
- Change belts and tighten
- Flush transmission fluid
- Install clutch bleeder kit, flush clutch fluid
- Oil change
- Test otterstat
- Fix luggage compartment latch
- Fix rear louvers latch
- Replace engine light switch
- Replace rear fascia
- Replace vacuum cap on charcoal cannister
- Recondition steering column ends
- Replace seal cap on passenger side, lower body
- Lower rear springs
- Replace alternator - D110
- Upgrade headlight switch - DMCNW
- Recondition front suspension components
- Re-grease all joints in front suspension
- Lower front springs - DMCUK
- Install Lower Control Arm Outriggers - DMCEU
- Replace sway bar bushings - DMCH
- Replace speakers, speaker wire and stereo head unit - Pioneer/Kicker
- Replace oil pressure gauge sender - Special-T
- Upgrade headlights - Sylvania Silverstars
- Install cooling system bleeder kit - DMCNW
- Upgrade cooling fans - DMCNW
- Replace fan shroud - DMCH
- Upgrade all shocks - Spax via Special-T
- Replace brake pads - Axxis via Special-T
- Replace caliper pins and springs - Special-T
- Replace all rotors - Special-T
- Coolant flush
- Upgrade fan and fan-fail relays to solid state
- Remove luggage net
Coolant flushed, fan relays upgraded! Lots more to do!
After a week of chasing leaks around the car, the coolant flush is finally done. I also installed solid state fan and fan-fail relays to replace a cumbersome fan relay unit. Pictures and more to come soon...Lots more work to do.
Sunday, January 8, 2012
Coolant Flushed! Now I can wait five years before doing it again!
Took me the better part of the entire weekend, but I managed to flush and replace the coolant in the DeLorean. The process was messy and nerve-wracking. While I was working on it, I installed DMC Northwest's excellent cooling system air bleeder kit that was a real benefit when it came time to burp the system of the excess air.
There was a small amount of rusty sediment in the reservoir bottle, so I removed it and flushed it off the car. The real problem was flushing the system with water as it ended up all over my garage floor. I couldn't let the antifreeze into the storm drains, so I had to clean it up and bottle it.
What's next? Fan relays, new belts, otterstat testing and those engine mounts...Hurts my head thinking about that.


Wednesday, January 4, 2012
Winter 2012 maintenance begins!
Although hopefully nothing as intensive as last year's brakes and suspension upgrades, this winter is already shaping up to be a nice laundry list of work. This winter's projects include -
- Coolant flush - (There's no delaying any longer!)
- Solid State Fan & Fan Fail Relays
- Otterstat check
- Engine Mounts Replacement
- Engine Bay light switch replacement
- Oil Change
- Transmission and Clutch Fluid Change
- Starter replacement (upgrade to 1991 Eagle Premier starter)
- Install clutch fluid bleed and cooling system air bleeder kits
- Have A/C inspected and recharged
Subscribe to:
Posts (Atom)